
Centralized logs collection with Logstash, ElasticSearch and Kibana in Amazon AWS
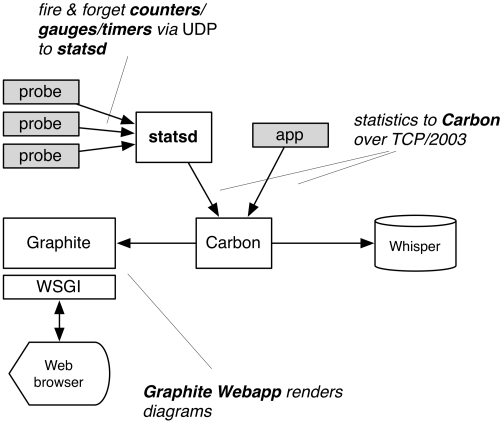
Logstash is a tool for managing events and logs. It is very useful for collecting, parsing and storing logs for later use like for example searching. It comes with a web interface for searching through the logs. The picture bellow shows a typical centralized logstash environment. It consists of logstash clients installed on the servers running applications we want to collect logs for and centralized logstash server that does the indexing and storing of the logs. These remote logstash instances are referred as shippers and the central one as indexer or reader.
 Picture1: Logstash environment
The broker of choice is Redis and the storage for indexing is Elastic Search, which comes natural since Logstash is part of Elastic Search project. The web interface will be served via Nginx which is light enough for this purpose.
Installation and setup
Central Server
Everything is installed on a single node. We start with some kernel tuning.
Kernel Setup
This will provide some system, memory optimization and network stack optimization and tuning for our EC2 instance type. At the end of the /etc/sysctl.conf we add:
### KERNEL ###

# Core dumps
kernel.core_uses_pid = 1
kernel.core_pattern = /mnt/core-%e-%s-%u-%g-%p-%t
fs.suid_dumpable = 2

# Turn on execshild
#kernel.exec-shield = 1
kernel.randomize_va_space = 1
# Reboot after 10sec. on kernel panic
kernel.panic = 10

### IMPROVE SYSTEM MEMORY MANAGEMENT ###

# Increase size of file handles and inode cache
fs.file-max = 2097152

# Insure we always have enough memory
vm.min_free_kbytes = 8192

# Do less swapping
vm.swappiness = 10
vm.dirty_ratio = 60
vm.dirty_background_ratio = 2

### GENERAL NETWORK SECURITY OPTIONS ###

# Avoid a smurf attack
net.ipv4.icmp_echo_ignore_broadcasts = 1

# Turn on protection for bad icmp error messages
net.ipv4.icmp_ignore_bogus_error_responses = 1

# Turn on syncookies for SYN flood attack protection
net.ipv4.tcp_syncookies = 1
net.ipv4.tcp_max_syn_backlog = 1024

# Turn on timestamping
net.ipv4.tcp_timestamps = 1

# Turn on and log spoofed, source routed, and redirect packets
net.ipv4.conf.all.log_martians = 1
net.ipv4.conf.default.log_martians = 1

# No source routed packets here
net.ipv4.conf.all.accept_source_route = 0
net.ipv4.conf.default.accept_source_route = 0

# Turn on reverse path filtering
net.ipv4.conf.all.rp_filter = 1
net.ipv4.conf.default.rp_filter = 1

# Make sure no one can alter the routing tables
net.ipv4.conf.all.accept_redirects = 0
net.ipv4.conf.default.accept_redirects = 0
net.ipv4.conf.all.secure_redirects = 0
net.ipv4.conf.default.secure_redirects = 0

# Don't act as a router
net.ipv4.ip_forward = 0
net.ipv4.conf.all.send_redirects = 0
net.ipv4.conf.default.send_redirects = 0

# Number of times SYNACKs for passive TCP connection.
net.ipv4.tcp_synack_retries = 2

# Allowed local port range
net.ipv4.ip_local_port_range = 2000 65535

# Protect Against TCP Time-Wait
net.ipv4.tcp_rfc1337 = 1

# Decrease the time default value for tcp_fin_timeout connection
net.ipv4.tcp_fin_timeout = 15

# Decrease the time default value for connections to keep alive
net.ipv4.tcp_keepalive_time = 300
net.ipv4.tcp_keepalive_probes = 5
net.ipv4.tcp_keepalive_intvl = 15
# This means that the keepalive process waits 300 seconds for socket
# activity before sending the first keepalive probe, and then resend
# it every 15 seconds. If no ACK response is received for 5 consecutive
# times (75s in this case), the connection is marked as broken.

### TUNING NETWORK PERFORMANCE ###

# Disable IPv6
net.ipv6.conf.all.disable_ipv6 = 1
net.ipv6.conf.default.disable_ipv6 = 1
net.ipv6.conf.lo.disable_ipv6 = 1

# Default Socket Receive Buffer
net.core.rmem_default = 31457280

# Maximum Socket Receive Buffer
net.core.rmem_max = 12582912

# Default Socket Send Buffer
net.core.wmem_default = 31457280

# Maximum Socket Send Buffer
net.core.wmem_max = 12582912

# Increase number of incoming connections
net.core.somaxconn = 5000

# Increase number of incoming connections backlog
net.core.netdev_max_backlog = 65536

# Enable TCP window scaling
net.ipv4.tcp_window_scaling = 1

# Increase the maximum amount of option memory buffers
net.core.optmem_max = 25165824

# Increase the maximum total buffer-space allocatable
# This is measured in units of pages (4096 bytes)
net.ipv4.tcp_mem = 65536 131072 262144
net.ipv4.udp_mem = 65536 131072 262144

# Increase the read-buffer space allocatable
net.ipv4.tcp_rmem = 8192 87380 16777216
net.ipv4.udp_rmem_min = 16384

# Increase the write-buffer-space allocatable
net.ipv4.tcp_wmem = 8192 65536 16777216
net.ipv4.udp_wmem_min = 16384

# Increase the tcp-time-wait buckets pool size to prevent simple DOS attacks
net.ipv4.tcp_max_tw_buckets = 1440000

# TIME_WAIT socket policy
# Note: if both enabled then disable
# net.ipv4.tcp_timestamps for servers
# behind NAT to prevent dropped incoming connections
net.ipv4.tcp_tw_recycle = 0
net.ipv4.tcp_tw_reuse = 1

# Enable TCP MTU probing (in case of Jumbo Frames enabled)
#net.ipv4.tcp_mtu_probing = 1

# Speedup retrans (Google recommended)
net.ipv4.tcp_slow_start_after_idle = 0
net.ipv4.tcp_early_retrans = 1

# Conntrack
# 288bytes x 131072 = 37748736 (~38MB) max memory usage
net.netfilter.nf_conntrack_max = 131072
net.netfilter.nf_conntrack_tcp_loose = 1

# NOTE: Enable this if EC2 instance support it
# -- 10gbe tuning from Intel ixgb driver README -- #
# turn off selective ACK and timestamps
#net.ipv4.tcp_sack = 0
#net.ipv4.tcp_timestamps = 0
and run:
sysctl -p
to activate the changes.
Install Redis Broker Server
We need broker services to buffer all the client updates while the central Logstash service is offline, in case of issues with Logstash or update etc.
root@myserver:~# aptitude install redis-server
In case all our remote clients were to connect directly to the broker we need to change the listening address in the config file and replace:
bind 127.0.0.1
with:
bind 0.0.0.0
in /etc/redis/redis.conf. We are going to do this temporarily for testing only since we are going to use stunnel to secure Redis communication.
For security reasons we want only the authenticated clients to communicate with the server so we set password in the config file:
requirepass <my-redis-password>
We also need to open the tcp port 6379 in the firewall (EC2 instance SecurityGroup) in case we enabled remote Redis access.
Enable the overcommit kernel memory option so every malloc() operation will succeed:
root@myserver:~# sysctl vm.overcommit_memory=1
and add it to /etc/sysctl.conf as well so it persists over bootups. Then start the service:
root@myserver:~# service redis start
Install and setup Elastic Search
We need at least version 0.90.7.
root@myserver:~#  wget https://download.elasticsearch.org/elasticsearch/elasticsearch/elasticsearch-0.90.9.deb
root@myserver:~#  dpkg -i elasticsearch-0.90.9.deb
Then edit the /etc/elasticsearch/elasticsearch.yml config file and set some options that suit our needs and VM hardware:
cluster.name: logstash
node.name: "ec2-logger-server"
path.data: /mnt/elasticsearch,/mnt2/elasticsearch
path.logs: /mnt2/log/elasticsearch
bootstrap.mlockall: true
network.host: "127.0.0.1"

## Threadpool Settings ##
# Search pool
threadpool.search.type: fixed
threadpool.search.size: 20
threadpool.search.queue_size: 100

# Bulk pool
threadpool.bulk.type: fixed
threadpool.bulk.size: 60
threadpool.bulk.queue_size: 300

# Index pool
threadpool.index.type: fixed
threadpool.index.size: 20
threadpool.index.queue_size: 100

# Indices settings
indices.memory.index_buffer_size: 30%
indices.memory.min_shard_index_buffer_size: 12mb
indices.memory.min_index_buffer_size: 96mb

# Cache Sizes
indices.fielddata.cache.size: 15%
indices.fielddata.cache.expire: 6h
indices.cache.filter.size: 15%
indices.cache.filter.expire: 6h

# Indexing Settings for Writes
index.refresh_interval: 30s
index.translog.flush_threshold_ops: 50000
We enable bootstrap.mlockall to try to lock the process address space so it won’t be swapped (recommended by ES configuration page). This also requires setting the following options in the /etc/default/elasticsearch file:
ES_HEAP_SIZE=2g
MAX_LOCKED_MEMORY=unlimited
We have also tuned the search, bulk and index pools giving the bulk pool 3 times more threads since the server will be mostly writing. We also tune the index sizes and cache flushes to reduce the load on the server under heavy writes.
Later on we had to add an additional drive via path.data:/mnt/elasticsearch,/mnt2/elasticsearch option to expand the index disk storage. This option also adds on speed since the combination of the two drives acts like a RAID0 for files, of course compared to chunks as in real RAID. I have also moved the logs to /mnt2/elasticsearch drive since it is a faster SSD drive.
Recommended Java for ES is Oracle JDK so we install it and make it default on the server:
root@myserver:~$ echo oracle-java7-installer shared/accepted-oracle-license-v1-1 select true | tee /usr/bin/debconf-set-selections && echo "deb http://ppa.launchpad.net/webupd8team/java/ubuntu precise main" | tee -a /etc/apt/sources.list && echo "deb-src http://ppa.launchpad.net/webupd8team/java/ubuntu precise main" | tee -a /etc/apt/sources.list && apt-key adv --keyserver keyserver.ubuntu.com --recv-keys EEA14886 && aptitude update && aptitude install -y oracle-java7-installer && aptitude install -y oracle-java7-set-default
In case of SSD drives, we are better off with Noop scheduler than the default CFQ (Completely Fair Queuing) one which is better for spindles disks.
root@myserver:~# cat /sys/block/xvdg/queue/scheduler
noop [deadline] cfq

root@myserver:~# echo noop | tee /sys/block/xvdg/queue/scheduler
noop

root@myserver:~# cat /sys/block/xvdg/queue/scheduler
[noop] deadline cfq
Install the HEAD and Marvel plugins so we have some overview of ES parameters and indices:
root@myserver:~# /usr/share/elasticsearch/bin/plugin --install mobz/elasticsearch-head --verbose
root@myserver:~# /usr/share/elasticsearch/bin/plugin --install elasticsearch/marvel/latest --verbose
The access to these plugins and ES restful API will be protected via NGINX proxy we set further down on this page. Then we start the service:
root@myserver:~# service elasticsearch start
Logstash Install and Config
The installation is a simple download of a jar file that contains all the tools needed:
root@myserver:~# mkdir /opt/logstash
root@myserver:~# mkdir /etc/logstash
root@myserver:~# mkdir /var/log/logstash
root@myserver:~# cd /opt/logstash
root@myserver:/opt/logstash# wget https://download.elasticsearch.org/logstash/logstash/logstash-1.3.3-flatjar.jar
root@myserver:/opt/logstash# ln -sf logstash-1.3.3-flatjar.jar logstash.jar
Configuration, /etc/logstash/reader.conf file:
input {
  redis {
    host => "127.0.0.1"
    type => "redis"
    data_type => "list"
    key => "logstash"
    password => "<my-redis-password>"
  }
}
output {
  stdout { debug => "true" }
  elasticsearch {
     cluster => "logstash"
  }
}
so pretty simple, we read from the broker and write to the storage which in this case is elastic search node/cluster we set up before. We start the logstash server from the command line as:
java -jar /opt/logstash/logstash.jar agent --verbose -f /etc/logstash/reader.conf --log /var/log/logstash/logstash-reader.log &
and send it running in the background. This is not very convenient so we set up an initd service script /etc/init.d/logstash-reader:
#! /bin/sh

### BEGIN INIT INFO
# Provides:          logstash-shipper
# Required-Start:    $remote_fs $syslog
# Required-Stop:     $remote_fs $syslog
# Default-Start:     2 3 4 5
# Default-Stop:      0 1 6
# Short-Description: Start daemon at boot time
# Description:       Enable service provided by daemon.
### END INIT INFO

. /lib/lsb/init-functions

mode="reader"
name="logstash-$mode"
logstash_bin="/usr/bin/java -- -jar /opt/logstash/logstash.jar"
logstash_conf="/etc/logstash/$mode.conf"
logstash_log="/var/log/logstash/$name.log"
pid_file="/var/run/$name.pid"

NICE_LEVEL="-n 19"

start () {
    command="/usr/bin/nice ${NICE_LEVEL} ${logstash_bin} agent --verbose -f $logstash_conf --log ${logstash_log}"

    log_daemon_msg "Starting $mode" "$name"
    if start-stop-daemon --start --quiet --oknodo --pidfile "$pid_file" -b -m --exec $command; then
        log_end_msg 0
    else
        log_end_msg 1
    fi
}

stop () {
    start-stop-daemon --stop --quiet --oknodo --pidfile "$pid_file"
}

status () {
    status_of_proc -p $pid_file "" "$name"
}

case $1 in
    start)
        if status; then exit 0; fi
        start
        ;;
    stop)
        stop
        ;;
    reload)
        stop
        start
        ;;
    restart)
        stop
        start
        ;;
    status)
        status && exit 0 || exit $?
        ;;
    *)
        echo "Usage: $0 {start|stop|restart|reload|status}"
        exit 1
        ;;
esac

exit 0
and set right permissions and schedule for start up:
root@myserver:~# chmod +x /etc/init.d/logstash-reader
root@myserver:~# update-rc.d logstash-reader defaults
At the end we start the service:
root@myserver:~# service logstash-reader start
We also need to manage the log files created by logstash so they don’t grow too big for which I set logrotate job in /etc/logrotate.d/logstash file:
/var/log/logstash/*.log {
    daily
    missingok
    rotate 5
    compress
    delaycompress
    notifempty
    create 644 root root
    sharedscripts
    postrotate
       /etc/init.d/logstash-shipper reload > /dev/null
    endscript
}
Web interface
For web interface frontend we use Kibana:
root@myserver:/opt# wget http://download.elasticsearch.org/kibana/kibana/kibana-latest.zip
root@myserver:/opt# unzip kibana-latest.zip
root@myserver:/opt# mv kibana-latest /var/www/kibana
We will front by NGINX proxy which gives us more stability, security, SSL and also user access control since Kibana doesn’t come with one. See Nginx LDAP module on Debian/Ubuntu for the details about compiling NGINX for LDAP support. See Secure Nginx with Naxsi, SSL, GeoIP and Google Page Speed modules on Debian/Ubuntu for the details about compiling NGINX with Naxsi and SSL support.
We are going to setup an SSL proxy for Kibana and ElasticSearch in a SSL enabled virtual host. We put the following in the /etc/nginx/sites-available/kibana file we create (just the related part given for brevity):
server {
...
    location / {
       include  /etc/nginx/mysite.rules;
       try_files $uri $uri/ /index.html;
       auth_ldap "Restricted";
       auth_ldap_servers ldap1;
       auth_ldap_servers ldap2;
    }

    ## Kibana proxy
    location ~ ^/_aliases$ {
       proxy_pass http://127.0.0.1:9200;
       proxy_read_timeout 90;
    }
    location ~ ^/.*/_aliases$ {
       proxy_pass http://127.0.0.1:9200;
       proxy_read_timeout 90;
    }
    location ~ ^/_nodes$ {
       proxy_pass http://127.0.0.1:9200;
       proxy_read_timeout 90;
    }
    location ~ ^/.*/_search$ {
       proxy_pass http://127.0.0.1:9200;
       proxy_read_timeout 90;
    }
    location ~ ^/.*/_mapping$ {
       proxy_pass http://127.0.0.1:9200;
       proxy_read_timeout 90;
    }

    ## Password protected end points
    location ~ ^/kibana-int/dashboard/.*$ {
       proxy_pass http://127.0.0.1:9200;
       proxy_read_timeout 90;
       limit_except GET {
          proxy_pass http://127.0.0.1:9200;
          auth_ldap "Restricted";
          auth_ldap_servers ldap1;
          auth_ldap_servers ldap2;
       }
    }
    location ~ ^/kibana-int/temp.*$ {
       proxy_pass http://127.0.0.1:9200;
       proxy_read_timeout 90;
       limit_except GET {
          proxy_pass http://127.0.0.1:9200;
          auth_ldap "Restricted";
          auth_ldap_servers ldap1;
          auth_ldap_servers ldap2;
       }
    }
    # Protected Proxy access to ES plugins and modules
    location ~ ^/elastic/(_.*) {
       proxy_read_timeout 90;
       proxy_pass http://127.0.0.1:9200/$1;
       proxy_redirect http://127.0.0.1:9200 https://myserver.mydomain.com/;
       auth_ldap "Restricted";
       auth_ldap_servers ldap1;
       auth_ldap_servers ldap2;
   }
...
}
At the end we enable the Kibana virtual host, disable the default one and restart Nginx:
root@myserver:/opt# rm -f /etc/nginx/sites-enabled/default
root@myserver:/opt# ln -sf /etc/nginx/sites-available/kibana /etc/nginx/sites-enabled/kibana
root@myserver:/opt# service nginx configtest
root@myserver:/opt# service nginx restart
Now we can go and change the ES link for Kibana:
root@myserver:/opt# vi /var/www/kibana/config.js
...
    /*elasticsearch: "http://"+window.location.hostname+":9200",*/
    elasticsearch: "https://"+window.location.hostname+":443",
...
After all this in place we should see the following dashbord after log in to https://myserver.mydomain.com:
 Picture2: Kibana dashboard
Obviously some configuration has been done to the dashboard and some data collected already when the screen shot was made.
 Picture3: ElasticSearch Marvel plugin
Clients
On the client side we need to set logstash to ship the log files we need and mark them in the same time in a way we can distinguish them later in the searches. But on each client we have to go through the same general installation and setup as outlined in the Logstash install and config section of the server set up. The only difference is that I’ve added -Xmx256m to the java start up command when launching Logstash to limit the memory we want the logstash java process to use since on start up it gets very busy parsing files and consumes all the resources available (especially if the process was stopped for some time and has to catch up going through lot of logs). This value should be adjusted according to the available system memory we have to spare on Logstash.
After that the setup of the logstash configuration file will depend on the server it is running on and the applications we need to collect logs for. So, to collect Tomcat logs and send them to Redis server we can put the following in the /etc/logstash/shipper.conf logstash configuration file:
input {
   file {
      type => "tomcat"
      path => [ "/var/log/tomcat7/catalina.out" ]
      codec => multiline {
        pattern => "(^\d+\serror)|(^.+Exception: .+)|(^\s+at .+)|(^\s+... \d+ more)|(^\s*Caused by:.+)|(^\s+)|(^\s*[{|}])|(^(\s+)?<\/?.+>$)"
        what => "previous"
      }
      tags => "MYTAG"
      sincedb_path => "/opt/logstash/logstash-tomcat.db"
   }
}
output {
   stdout { }
   redis {
      host => "127.0.0.1"
      data_type => "list"
      key => "logstash"
      password => "<my-redis-password>"
   }
}
For MongoDB lets say (running two db’s example):
input {
   file {
      type => "mongodb"
      path => [ "/var/log/mongodb/mongodb.log" ]
      sincedb_path => "/opt/logstash/logstash-mongodb.db"
      tags => ["MYTAG1","MYTAG2"]
   }
   file {
      type => "mongodb2"
      path => [ "/var/log/mongodb2/mongodb2.log" ]
      sincedb_path => "/opt/logstash/logstash-mongodb2.db"
      tags => ["MYTAG1","MYTAG2"]
   }
}
filter {
  if [type] ~ "mongodb" and [message] !~ /(.+)/ {
    drop { }
  }
}
output {
   stdout { }
   if !("_grokparsefailure" in [tags]) {
     redis {
        host => "127.0.0.1"
        data_type => "list"
        key => "logstash"
        password => "<my-redis-password>"
     }
   }
}
For HAProxy, logstash has built in filters and parsers that will sort the messages nicely for us (added geoip tagging below as bonus):
input {
   file {
      type => "haproxy"
      path => ["/var/log/haproxy.log"]
      exclude => ["*.gz"]
      sincedb_path => "/opt/logstash/logstash-hap.db"
   }
}
filter {
   if [type] == "haproxy" {
     grok {
       match => {"message" => ["%{HAPROXYHTTP}"]}
       add_tag => ["MYTAG1","MYTAG2"]
     }
     geoip {
       source => "client_ip"
       target => "geoip"
       database => "/usr/share/GeoIP/GeoLiteCity.dat"
       add_field => [ "[geoip][coordinates]", "%{[geoip][longitude]}" ]
       add_field => [ "[geoip][coordinates]", "%{[geoip][latitude]}"  ]
     }
     mutate {
       convert => [ "[geoip][coordinates]", "float"]
     }
   }
}
output {
   stdout { }
   redis {
      host => "127.0.0.1"
      data_type => "list"
      key => "logstash"
      password => "<my-redis-password>"
   }
}
In case of ActiveMQ host lets say:
input {
   file {
      type => "activemq"
      path => [ "/opt/activemq/data/activemq.log*" ]
      codec => multiline {
        pattern => "(^\d+\serror)|(^.+Exception: .+)|(^\s+at .+)|(^\s+... \d+ more)|(^\s*Caused by:.+)|(^\s+\")|(^\s*[{|}])"
        what => "previous"
      }
      tags => ["MYTAG"]
      sincedb_path => "/opt/logstash/logstash-amq.db"
   }
}
filter {
  if [type] == "activemq" and [message] !~ /(.+)/ {
    drop { }
  }
}
output {
   stdout { }
   if !("_grokparsefailure" in [tags]) {
     redis {
        host => "127.0.0.1"
        data_type => "list"
        key => "logstash"
        password => "<my-redis-password>"
     }
   }
}
Or ElasticSearch:
input {
   file {
      type => "elasticsearch"
      path => [ "/var/log/elasticsearch/*.log" ]
      codec => multiline {
        pattern => "(^\d+\serror)|(^.+Exception: .+)|(^\s+at .+)|(^\s+... \d+ more)|(^\s*Caused by:.+)|(^\s+\")|(^\s*[{|}])"
        what => "previous"
      }
      tags => ["MYTAG"]
      sincedb_path => "/opt/logstash/logstash-es.db"
   }
}
filter {
  if [type] == "elasticsearch" and [message] !~ /(.+)/ {
    drop { }
  }
}
output {
   stdout { }
   if !("_grokparsefailure" in [tags]) {
     redis {
        host => "127.0.0.1"
        data_type => "list"
        key => "logstash"
        password => "<my-redis-password>"
     }
   }
}
To collect logs from an SMTP server and about bounced massages only we put:
input {
   file {
      type => "postfix"
      path => ["/var/log/mail.log"]
      sincedb_path => "/opt/logstash/logstash-postfix.db"
      start_position => "beginning"
   }
}
filter {
  if [type] == "postfix" and [message] =~ /status=bounced/ {
      grok {
        patterns_dir => "/etc/logstash/patterns"
        match => ["message", "%{POSTFIXBOUNCE}"]
        named_captures_only => true
        add_tag => ["BOUNCED","SMTP"]
      }
  }
}
output {
   stdout { }
   redis {
      host => "127.0.0.1"
      data_type => "list"
      key => "logstash"
      password => "<my-redis-password>"
   }
}
to filter the logs through the POSTFIXBOUNCE pattern we set in /etc/logstash/patterns/postfix file available here.
On the servers that run multiple of the above services we simply combine two or more file handlers in the input section. To start the logstash client service we run:
$ sudo service logstash-shipper start
using the same bash init script as for the reader but named /etc/init.d/logstash-reader in this case.
Security
Since Redis doesn’t support SSL we need to secure the data transfer between the clients and the central server. As mentioned before we will setup stunnel on the server and clients side for this purpose. On the clients, the logstash-shipper process will write to its localhost redis port where stunnel will listen and forward the messages to the remote stunnel on the server via SSL. The server’s stunnel process will then hand over the data to the local redis server in clear text.
Please refer to the following wiki page Securing Logstash to Redis communication with Stunnel for the details.


Leave a Comment